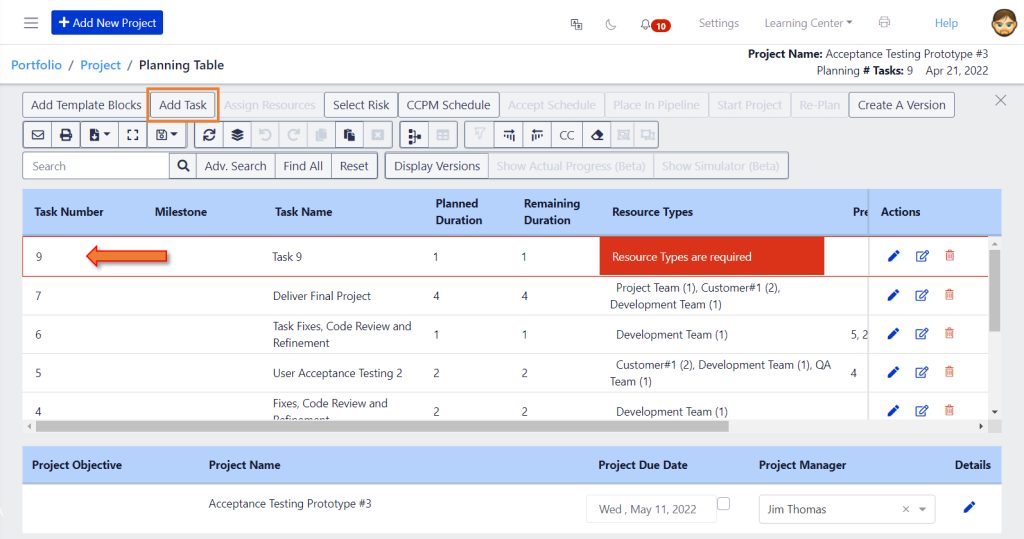
During Planning, Users can switch between the PERT or the Planning TABLE.
Click the “Open Table” icon to continue Planning your project in the Table View.

Add Task: Click “Add Task” to add a new Task.
Tasks with missing information will display a red rim.
Task #: Exepron will assign the Task number. The Task number can be changed as
required.
Task Name: Enter the name of the Task, a brief description required to complete the
Task (less than five words).
The Task Name can be edited as required.
Planned Duration: Enter the number of days required to complete this Task in Days.
Touch Time: Schedule only the estimated “touch time” for a task. This means all disruptions, delays, contingency, ‘safety time,’ or ‘padding’ time must be removed.
Exepron will not accept partial days or 0 days.
A work day = 8 hours.
The Work Week for this Account is selected in the Calendar for this Portfolio Account
(Settings/Calendar).
Or click the Task Details icon to open the Task Details. Enter Task information.
Planning Table capability, short video: Copy / Paste in Planning and Started Mode
Resource Type: Click on the Resource Type field to open the Assign Resource Type
Table to Assign Resource Types and Quantity for each Task.
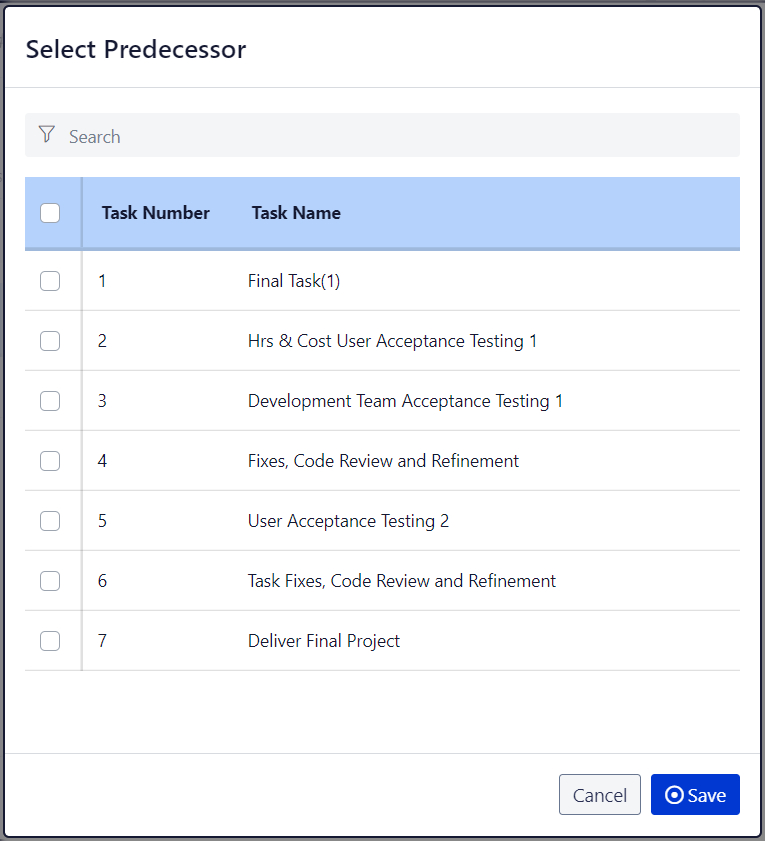
Predecessors: Click on the Predecessor field to open the Predecessor Table. Select
the Predecessor Task(s).
Delete a Predecessor Dependency: De-select the checkbox to remove the dependency.
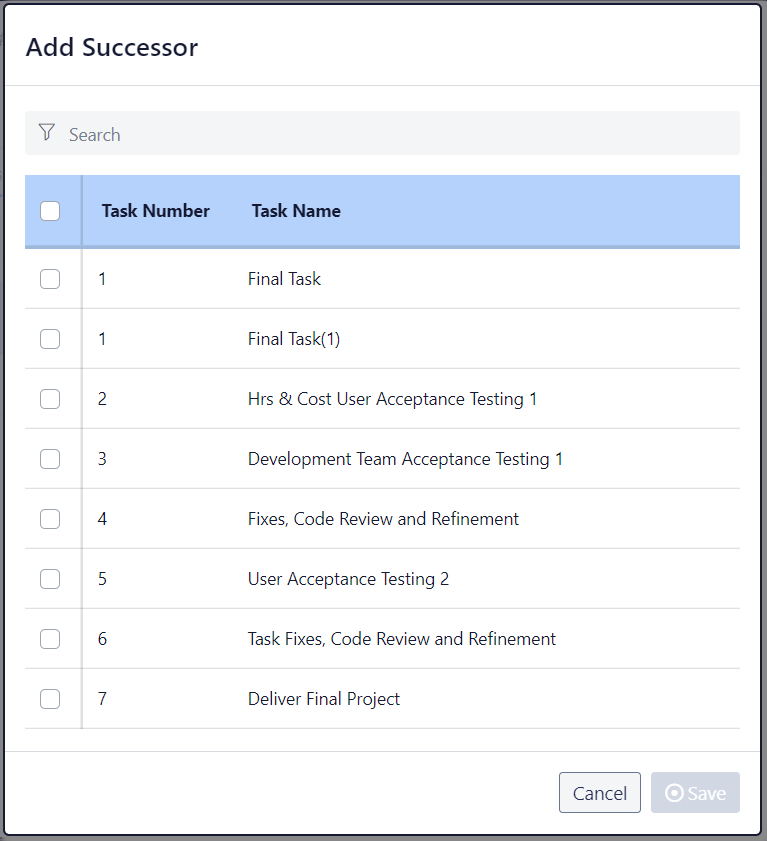
Successors: Click on the Successor field to open the Successor Table. Select the
Successor Task(s).
Delete a Successor Dependency: De-select the checkbox to remove the dependency.
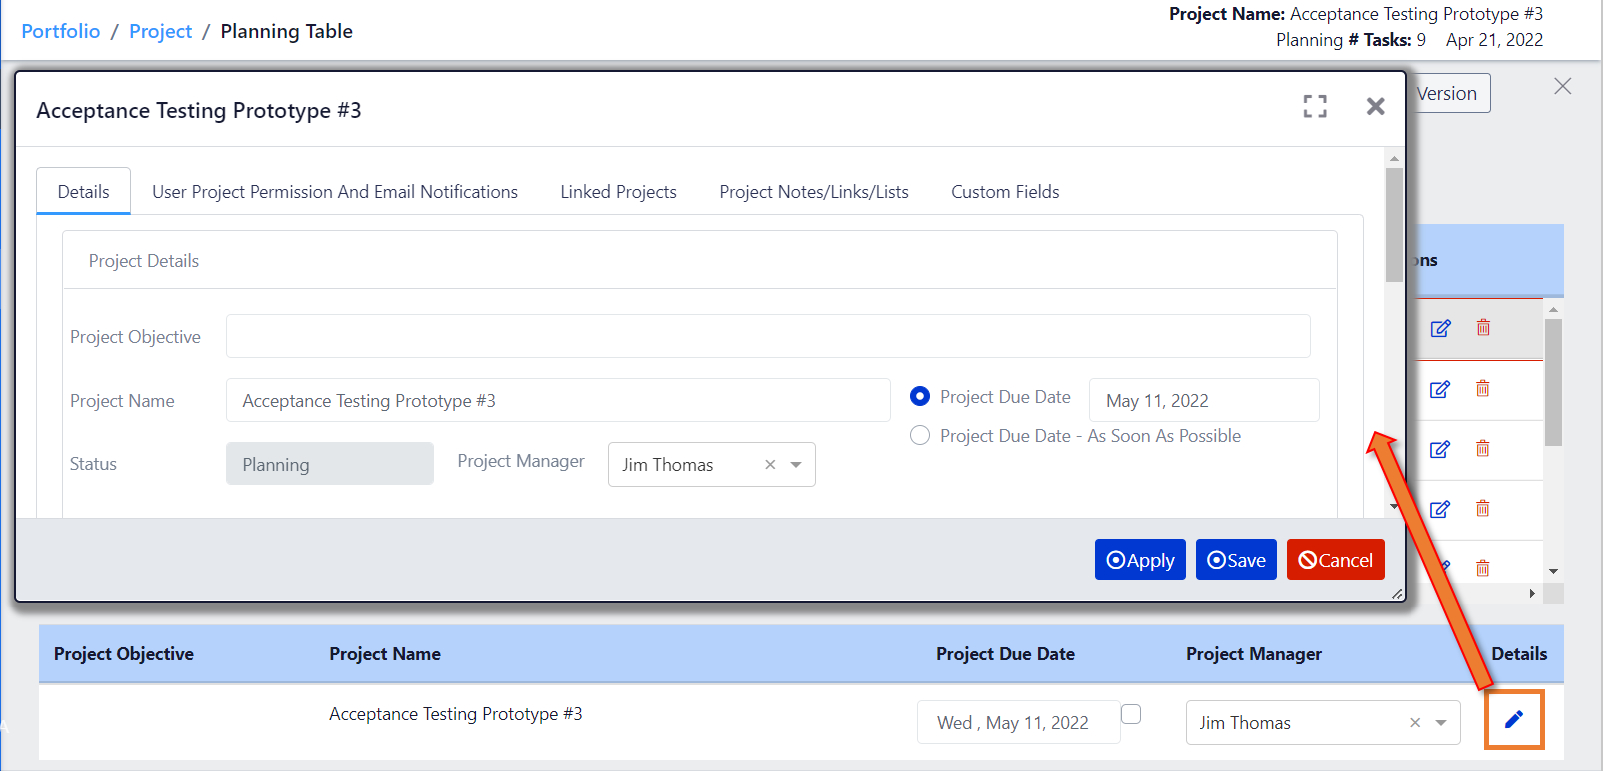
Project Details: Click on an entry field to enter information or edit the entry field.
Add or change the Project Name, the Project Objective, and the Project Manager, and enter a
Project Due Date.
Click the Project Details button to open the Project Details.
Project Name: Enter the name of the Project.
Project Objective: Add the Project Objective (Final Task). Start with the end in mind.
Thoroughly discuss the precise wording of your Project’s Objective (the desired
outcome) with the Project Team.
User Project Permission and Email Notifications:
Project Permission by User – Select Users who may view/access this Project in the
Project Permission column.
Email Notifications by User – Select the specific Email Notifications per individual User
in this particular project in each Email Notification column.
Due Date: Select a due date for your Project. Either a contractual obligation, a
corporately given Due Date or allow the Team to select a Due Date based on a need.
As Soon As Possible Due Date: (ASAP) Users can schedule a project without setting a Due
Date – check the box next to the Due Date, and Exepron will automatically provide an ASAP
date.
Project Manager: Select the Project Manager. A Project Manager has overall
responsibility for all aspects of the project: The Planning, Scheduling, and Execution
phases.
A User is designated as a Project Manager in Settings/Users/User Details.
The Project Manager assigned to a project can be changed when required.
Note: Only one Project Manager can be assigned to a Project.
Delete a Task: Click the Delete button to delete a task. Re-establish the task
dependencies after deleting a Task.
Click the “Open Chart” icon to view the Project in PERT view.

Task Details
Task Details displays all task information during Planning, Scheduling and
Execution.
Open the Task Details for a Project in Planning as follows:
Planning PERT view: Double-click on the top left corner of the yellow sticky to
open the Task Details.
Planning TABLE view: Click the Task Details button to edit the Task Details.
Open the Task Details for an Accepted, Pipeline, or Started Project as follows:
Project Dashboard: Click the Task Name in the Project Dashboard Table to
open the Task Details or click the Update Tasks button to view the Task Table.
Click Edit Task to open the Task Details.
CCPM Schedule: Double-click on the Task box in the CCPM schedule screen to
open the Task Details.
CCPM Schedule – Left Table: Click the Project Name to open the Task Details.
My Dashboard: Click the View/Update Tasks button. Click Edit Task to open the
Task Details.
Project Dashboard/Update Tasks: Click the Update Tasks button to display the
table. Click Edit Task to open the Task Details.
Task Name: Enter the name of the Task, a brief description required to complete the
Task (less than 5 words).
The Task Name can be edited as required.
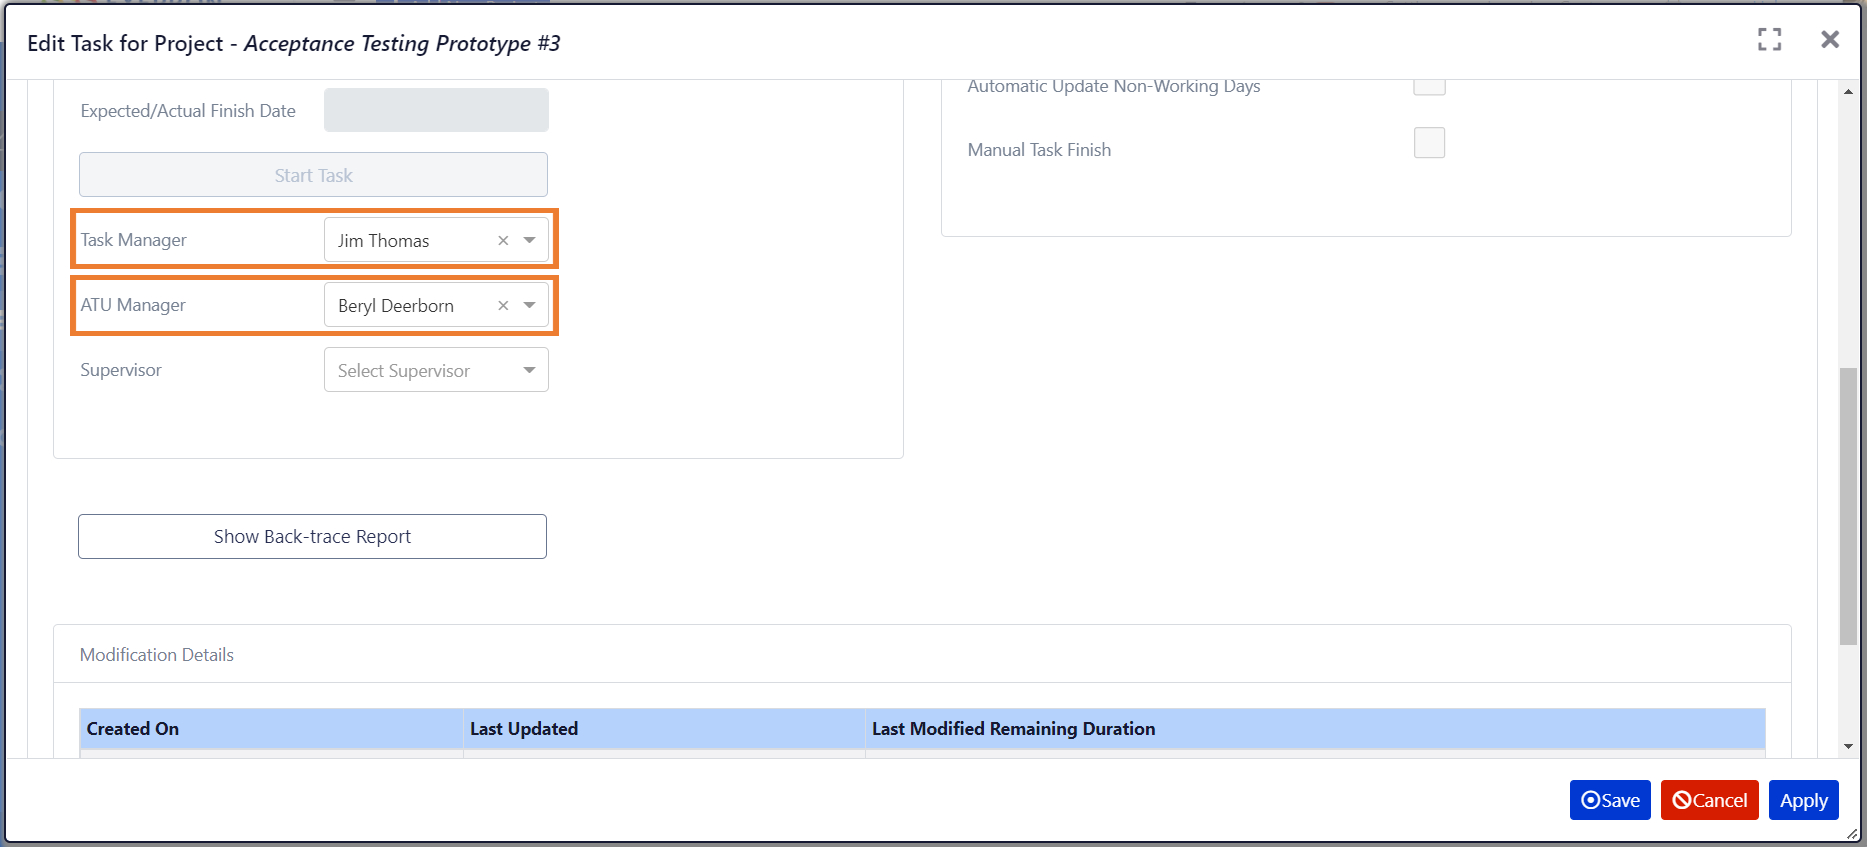
Task Manager: Add a Task Manager by selecting the Task Manager Name from the
dropdown menu.
Users who are designated as Task Managers in Settings/User Details will display in the
Task Manager dropdown.
The Task Manager can be changed as required.
Automated Task Update Manager: Add an Automated Task Update Manager by
selecting the ATU Manager Name from the dropdown menu. Users who are designated
as Automated Task Update Managers in Settings/User Details will display in the
Automated Task Update Manager dropdown.
The Automated Task Update Manager can be changed as required.
The Automated Task Update Utility is an optional feature available for certain
environments at an additional cost.
