Export directly from MS Project with the Exepron MS Project Add-In:
Use the Exepron MS Project Add-In to export directly from MS Project into Exepron.
Download the Exepron MS Project Add-In and the Instructions from the Learning
Center.
Exepron uses a modified MS Excel Template, referred to as the Exepron Project File
Template, as the intermediary to import from most Project Management software
solutions.
Preparation Steps before importing your Project into Exepron via the Exepron Project
File Template:
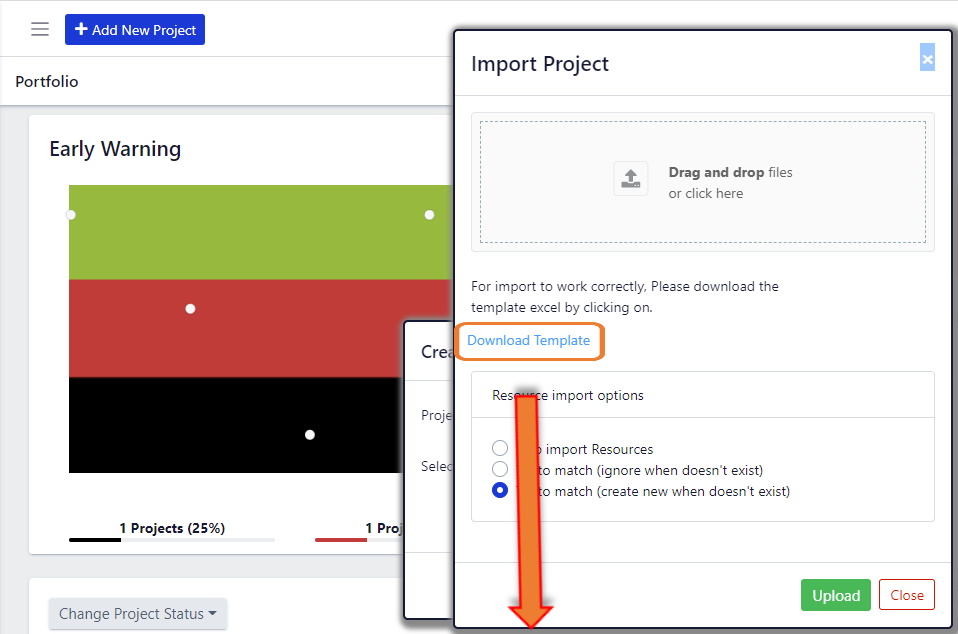
⦁ Download the Exepron Project File Template in Add New Project, click Download
Template.
⦁ Copy and Paste your project data from into the Exepron Project File Template.
⦁ Remove all dates, except the Project Due Date (short date format).
⦁ Do not use any other MS Excel spreadsheet/template – the Exepron Project File
Template includes special settings.
⦁ Import into Exepron by clicking Add New Project, Import.
Importing into Exepron using the Exepron Project File Template (MS Excel)
Download the Exepron Project File Template (MS Excel).
Click Add New Project, click Import, click Download Template to download the Exepron
Project File Template.

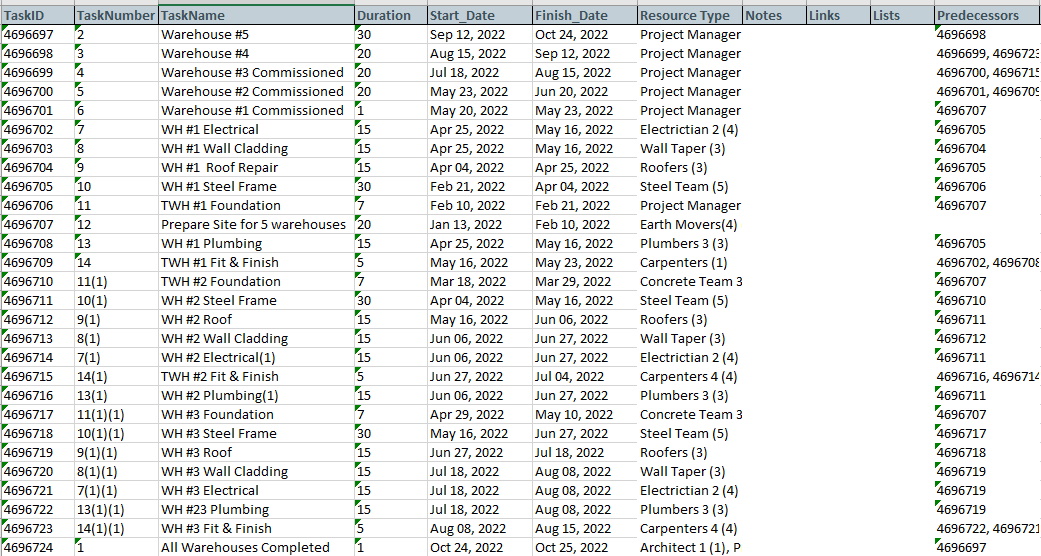
Copy and Paste your project data into the Exepron Project File (MS Excel) Template.
Exepron MS Excel Template columns:
ID: Add the ID number to correspond with the Task Name e.g. 1, 2, 3 etc. through to
the last Task.
Task Number: Add the Task Number to correspond with Task Name e.g. 1, 2, 3 etc.
through to the last Task.
Task Name: Task Names appears in this column.
Duration: Number format only. Remove any TEXT behind the duration numeral, e.g. 8
days should be 8.
Start Date: Delete all dates in this column (Exepron will reschedule and insert new
dates).
Finish Date: Delete all dates in this column. Enter a Finish Date for the Last Task
only. This date may be changed in Exepron during the Planning phase.
Resource Types: Resource Types appear in this column and will be imported with one
(1) Resource Type each.
Notes/ links/ Lists: These will import if displayed (optional).
Predecessors: Ensure that all Predecessors appear in this column.
Save your Exepron Project File with a suitable name and location on your hard drive.
Export a project with Custom Fields: Exporting from Exepron, making changes and
Importing an Exepron Download Template file with data in the Custom Field columns
should match the corresponding Custom Field Headings in Settings/Custom Field
Headings.
You are now ready to Import your project into Exepron.
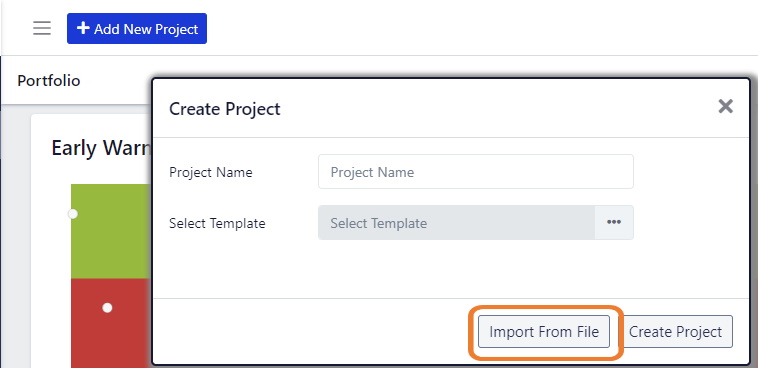
Click “Add New Project”.
Enter a Project Name (not required). Click the Import button.
Click the “Browse” button. Click “Add” to select the Project file to upload
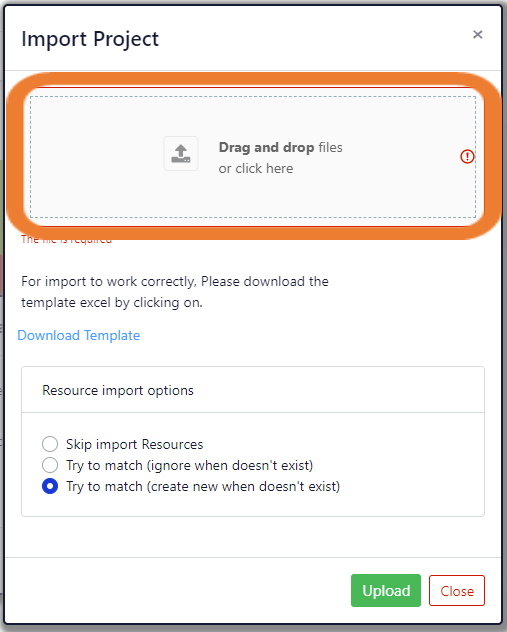
Click “Ok” to retrieve the file.
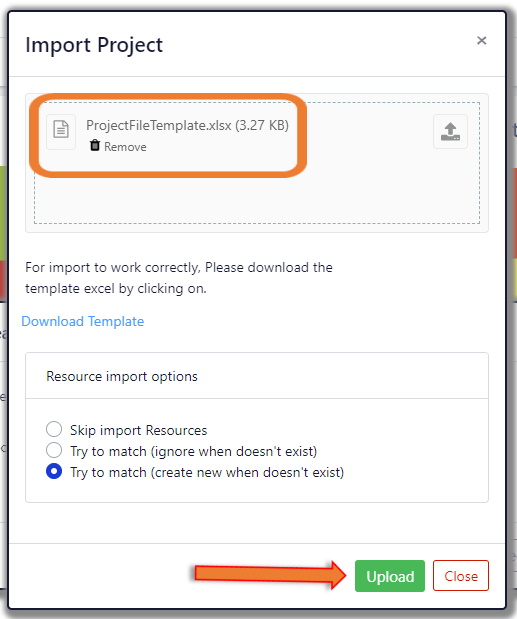
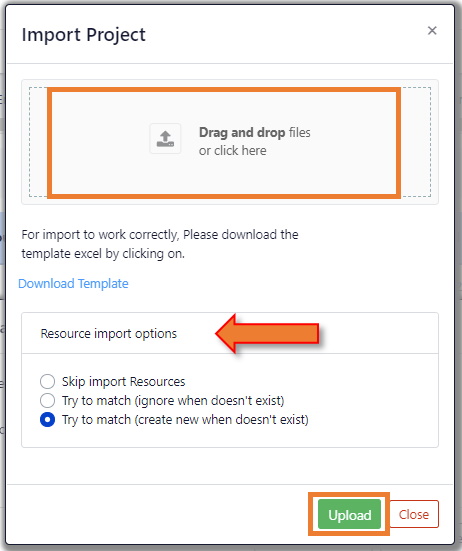
Select one of the Resources Import Options. Click the “Upload” button.
The project will open and display in the Pert /Table View.
The Final Task will display as the Project Name. Edit the Project Name, enter the
Project Objective etc.
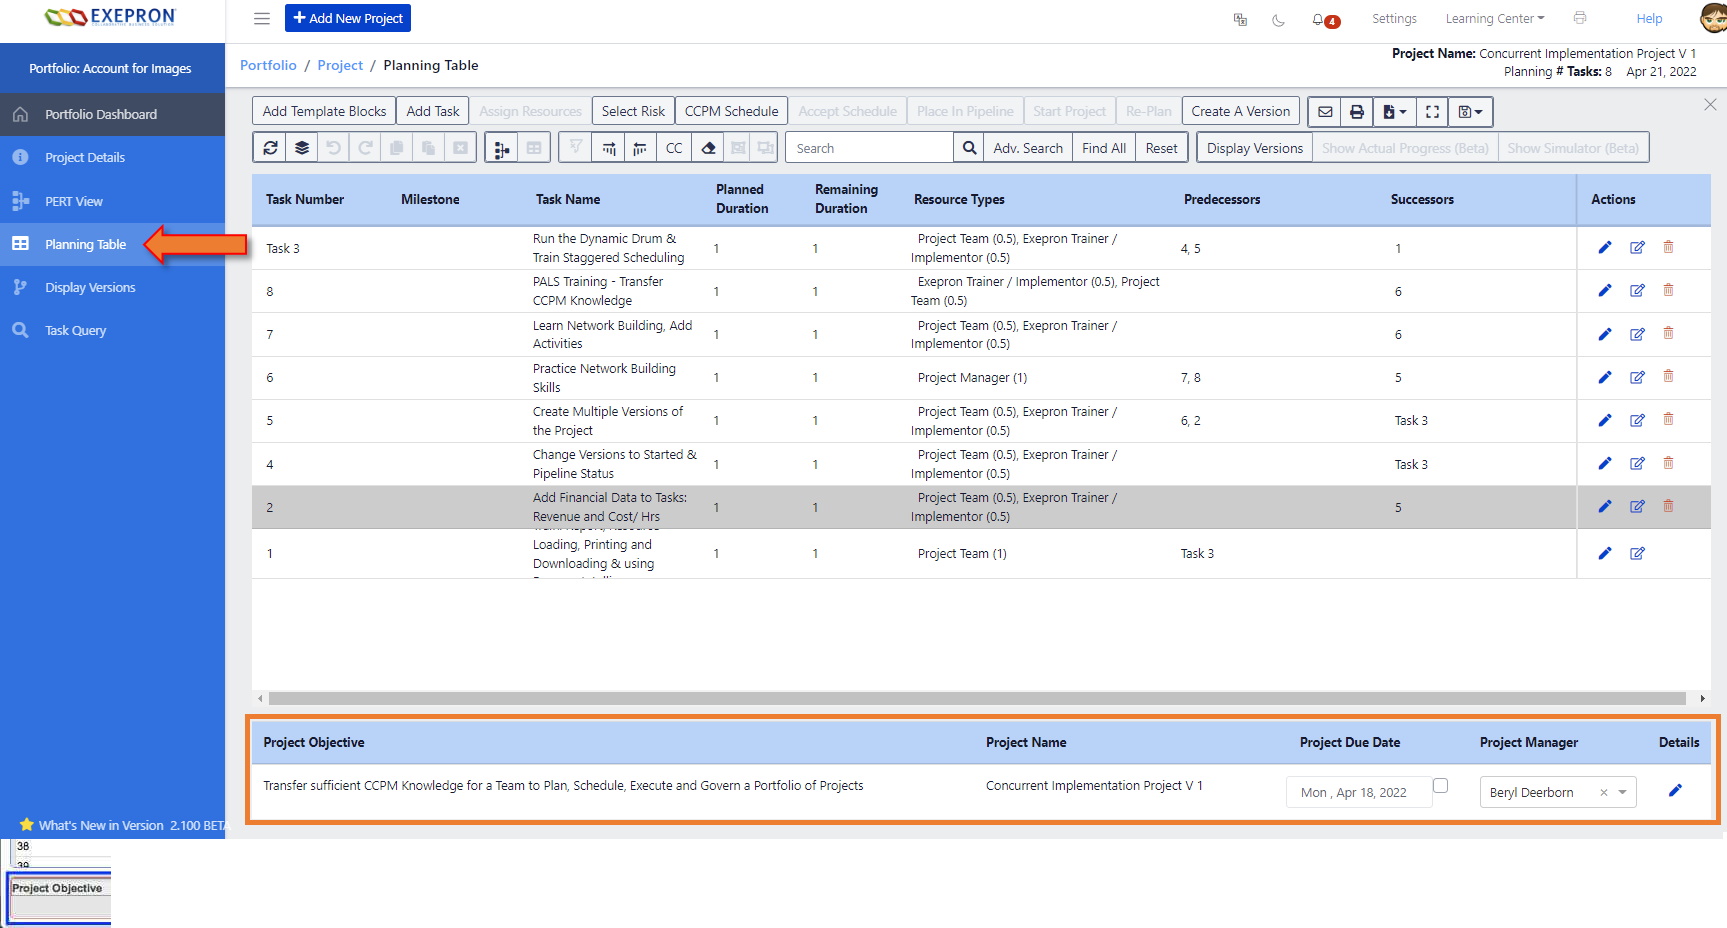
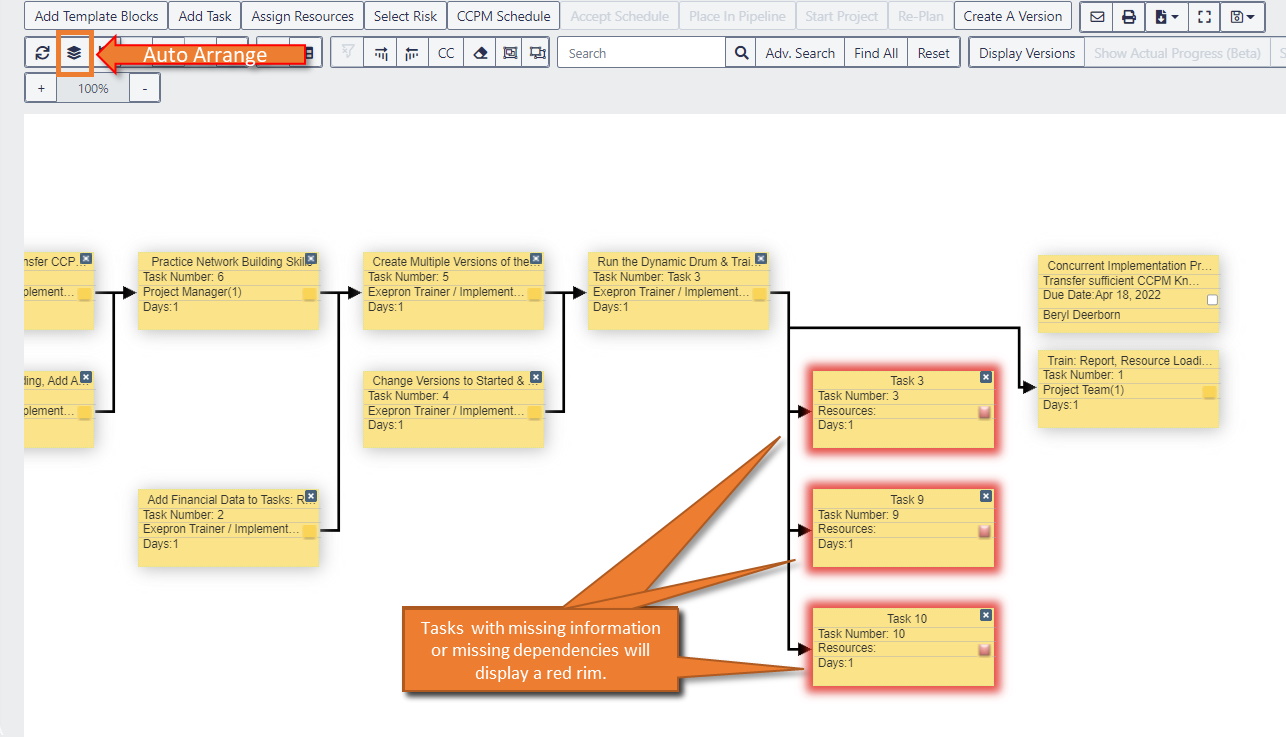
Click the Open Table icon to view the project in the PERT. Click Auto Arrange to
reposition the tasks.
Tasks with missing information or missing dependencies will display with a red rim in the
PERT and Table.
Additional Notes:
⦁ If the imported Resource Types are not entered in Settings, Exepron will import the
Resource Types with the default quantity of one (1) Resource Type available for this
account.
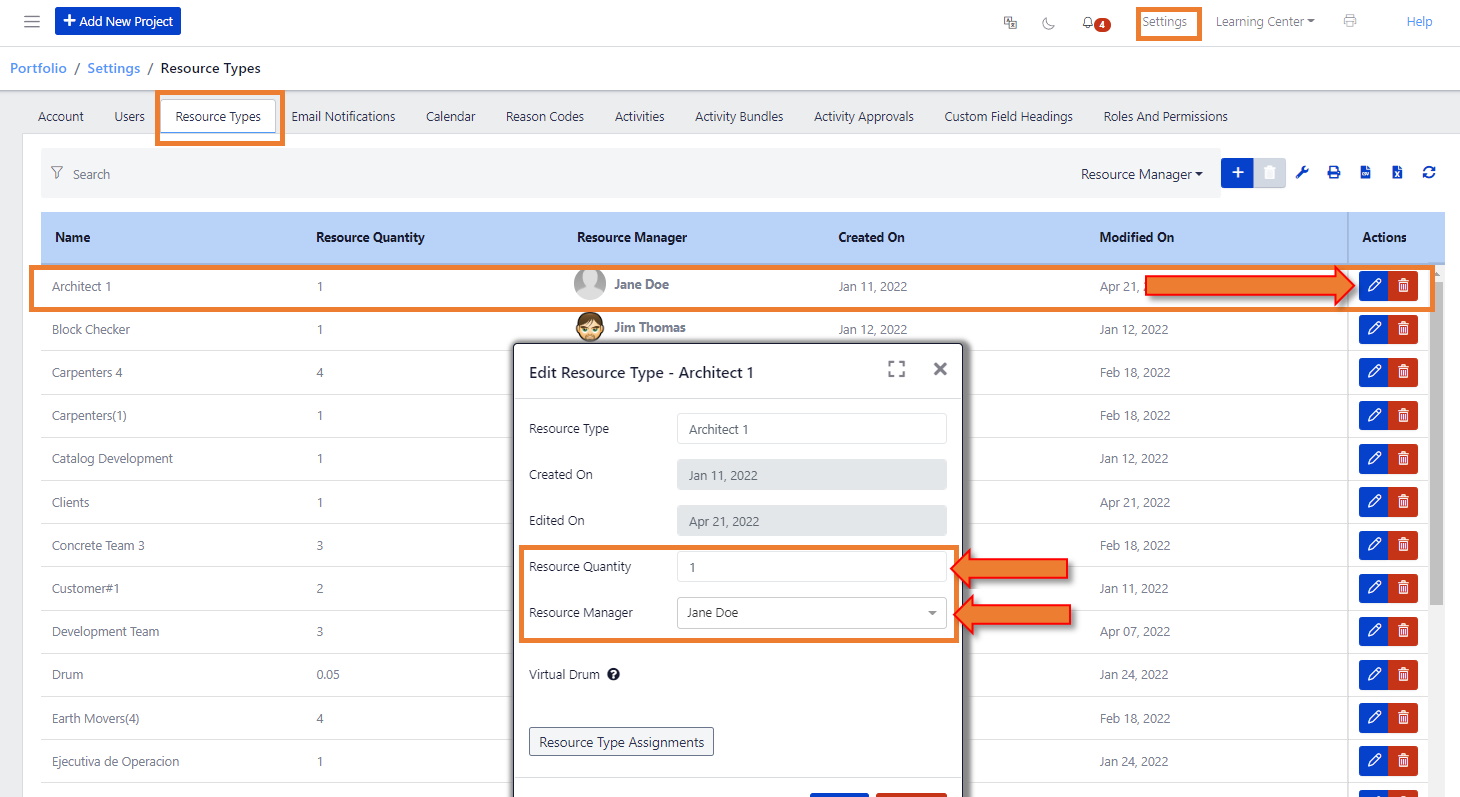
⦁ After importing your project (before scheduling the project), the Project Manager or the Resource Manager should manually edit the available quantity of a specific Resource Type in Settings. Click Settings, select a Resource Type to edit, click the Edit button.
⦁ After importing, the Resource Types will automatically be assigned to the original Account Administrator. Manually assign the Resource Type to a Resource Manager.
Click Settings, select a Resource Type to edit, click the Edit button.
