Login: Click Log in to log in to your Exepron Account.
Contact: For support: Click “Contact” to contact Exepron Support and send an email to CustomerSupport@exepron.com
My Dashboard: The Project Portfolio Dashboard
For New Accounts: As there are no Projects or Resources, therefore No information will display in the account.
To start, go to the Reference guide section “Settings Administration.”
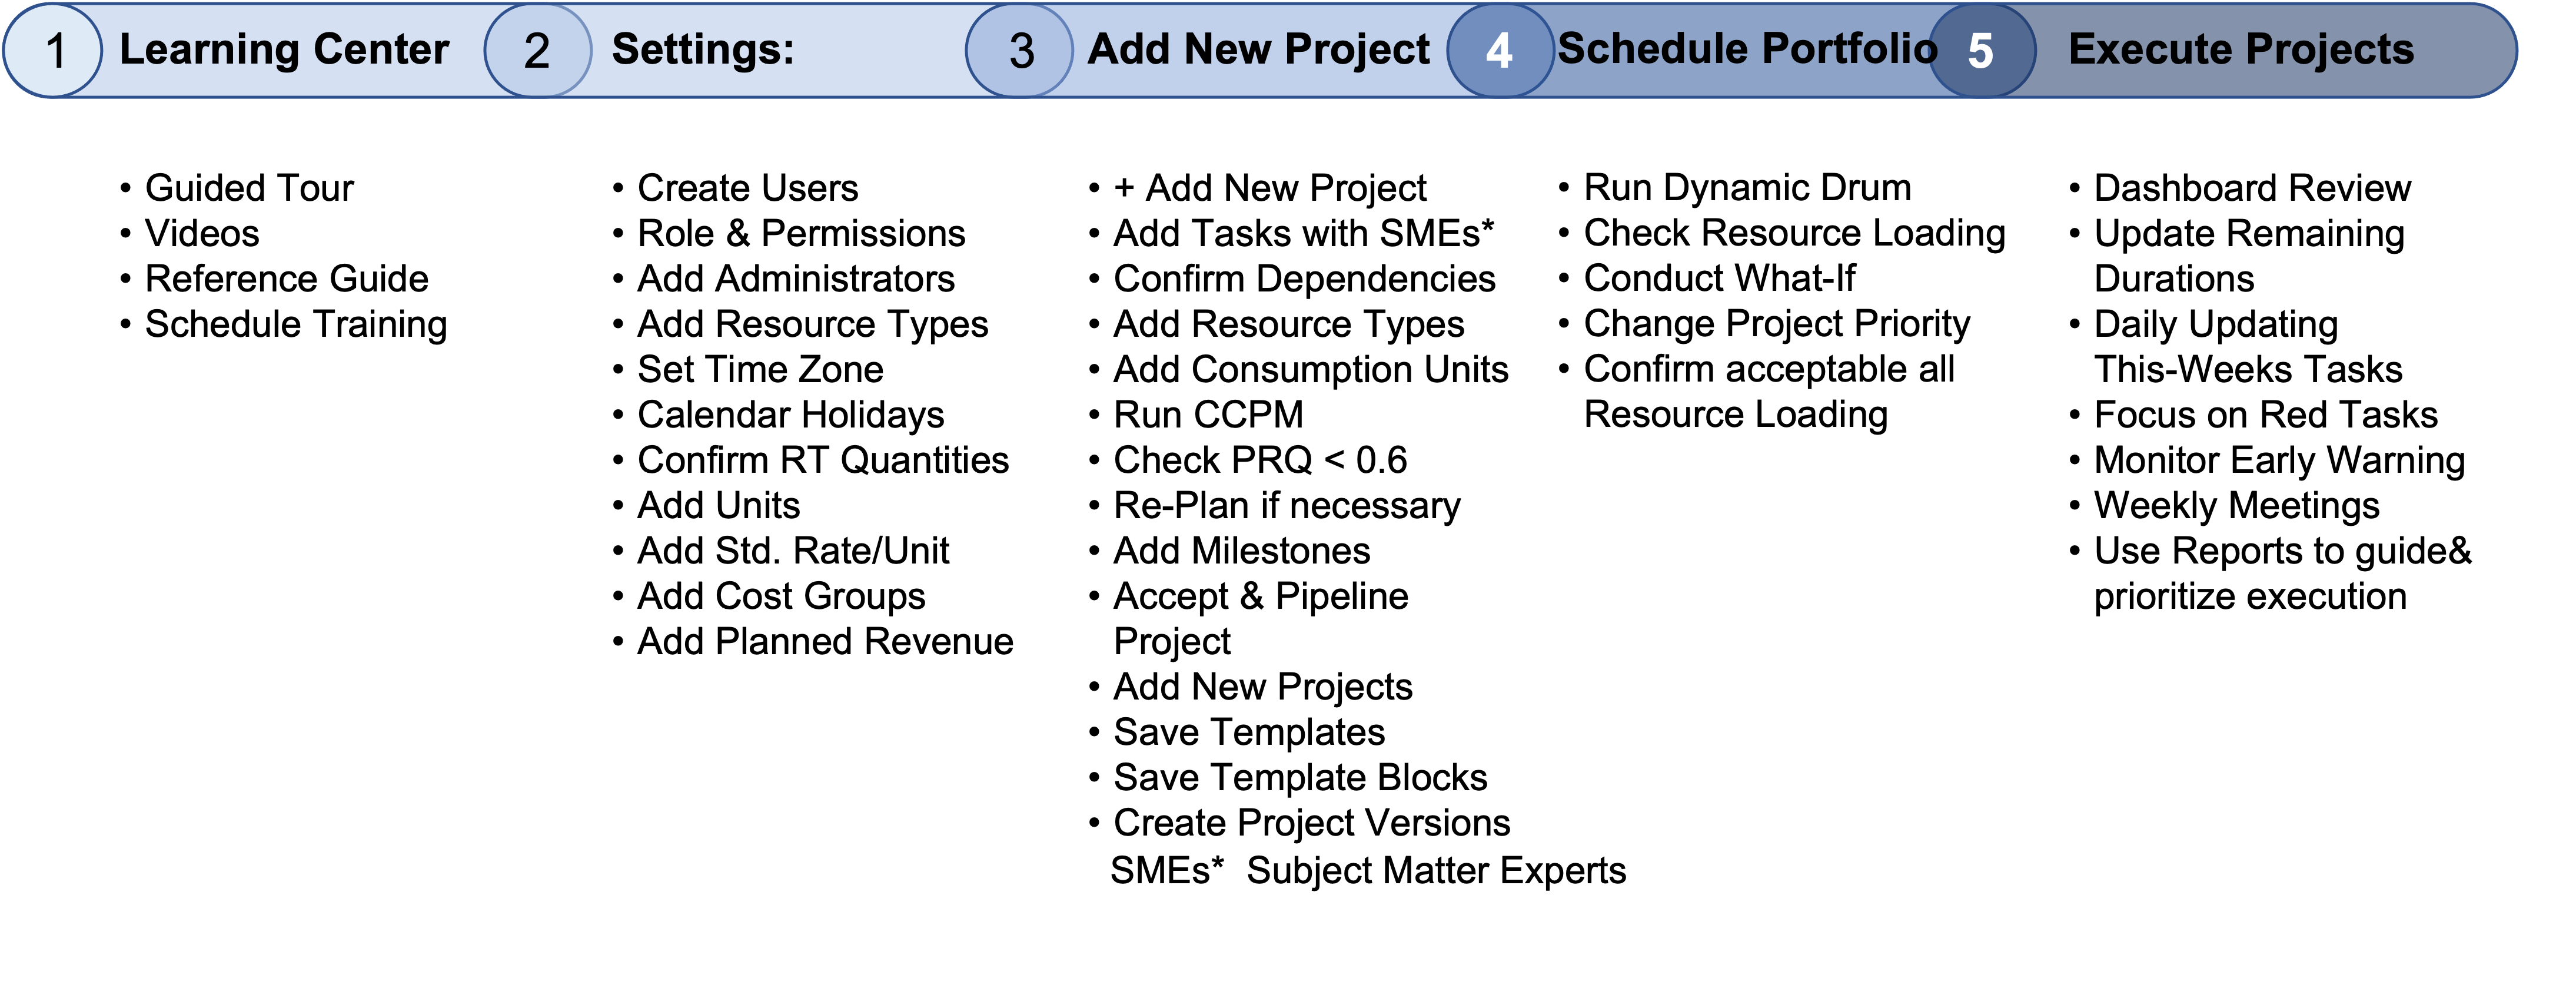
Recommended Sequence for the first time Use #
- Plan my first project;
- Add a Resource Type;
- Execute a Project;
- Add more Users.
Here are the main actions to create your first Project:
1. Plan my first project; 2. Add a Resource Type; 3. Execute a Project; 4. Add more Users.
To perform the main actions for the given categories in Exepron’s software, follow these steps:
-
To create a new project in Exepron, you should follow these steps: #
-
- Log in to your account using your credentials.
- Click “Add New Project(+)” to create a new project. A PERT canvas will appear, displaying the Project Objective Box and the Final Task.
- Enter the Project Name and Objective.
- Optionally, you can select a Template from the Templates and Template Blocks Library to apply to the new project. Note that new accounts might not display templates or template blocks immediately.
- Alternatively, you can import a project using the Exepron Download Template. Refer to the ‘Importing into Exepron’ documentation for additional import information.
For detailed instructions and options during the project creation process, consult the Learning Center / Reference Guide.
-
To add a new User to a given portfolio in Exepron, follow these steps: #
-
- Navigate to the Settings / User (tab). This is where all users, including vendors and subcontractors, are added. It is important to note that vendors and subcontractors can be added as users with limited access, controlled through permissions set in Project Permission etc.
- Click the [+]” to create a new user—top left menu area.
- Enter the user details in the provided fields.
- After entering the details, click “Apply” to save the new user.
- Next, click on the Permissions Tab to assign the user role and designate the appropriate permissions for the new user.
- Finally, click “Apply” again to confirm the user’s permissions. Then, “Save” the User.
- New Users must verify the email and create a unique password.
-
Adding a Resource Type in Settings / Resource Type (tab): #
Locate the (+) sign at the top right menu. This is your starting point for adding a new resource type.
-
- Fill in all the Data fields for the Resource Type (RT).
- In the ‘Resource Quantity,’ enter the number for the specific RTs available at your organization.
- Fill in all data fields as required when allocating RTs to Tasks.
Allocating Resource Types to Tasks:
-
- In the Planning PERT view, click on the little RED square on each Task Box to receive a dropdown menu of all available RTs.
- Allocate the appropriate number of RTs required to complete the Task.
- Alternatively, click on any Yellow Task Box to open Task Details to add RTs.
-
Execute a Project – To Update a Started project, follow these steps: #
-
- On the Portfolio Dashboard: Navigate to the specific project to update.
- Review project status: Examine the project’s status to understand what needs to be updated. Red Task will appear as ‘Immediate Attention Required.’
- Update project Tasks: Identify Red Tasks as the priority and then by the earliest Planned / Expected Start date.
- Adjust the Tasks Estimated Remaining Duration.
- Manage Resources: If allocation needs to be adjusted, add or remove resources from tasks as required.
- Communicate changes: Conduct daily Task Updates and a Weekly review to notify all stakeholders, team members, and resource managers of the changes made.
- Updating includes Reason Codes for delays, project notes, milestones, or status reports.
Refer to the Learning Center / Reference Guide for detailed instructions. Conduct a Keyword search for specific information.
Following this sequence provides a practical Road Map after opening Exepron.

Getting Help
![]()
Click Help or Learning Center to view the Exepron Reference Guide.
Learning Center

- Exepron Video Tutorials
- Exepron Reference Guide
- Importing into Exepron
- FAQ
- MS Project Add-In
- MS Project Add-In Download Instructions


