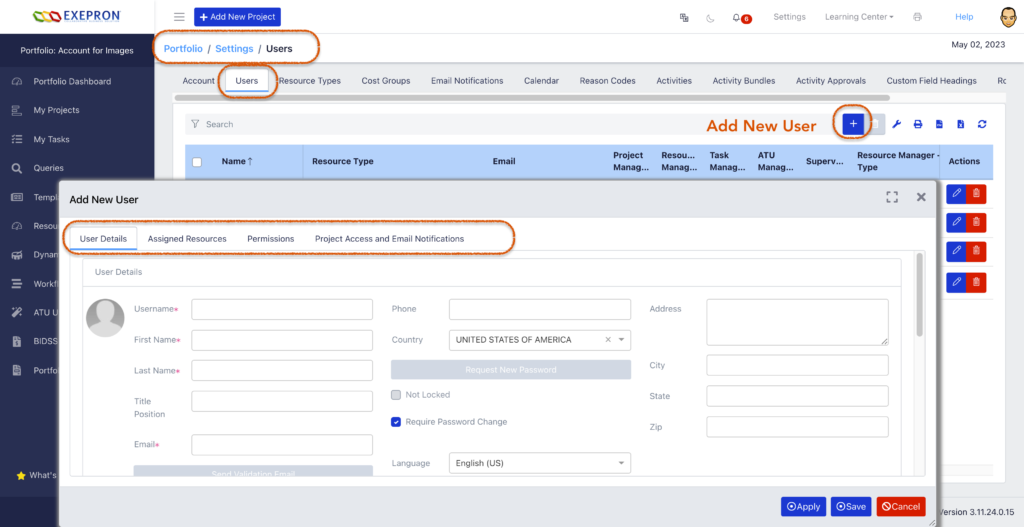
To Add a New User in Exepron 3.0, follow these steps:
- Log in to Exepron 3.0: Open your web browser and navigate to the Exepron 3.0 login page.
Enter your login credentials to access your account. - Click on the Settings tab: Once logged in, click on the Settings tab in the top navigation bar.
- Click on the Users link: On the Settings page, click on the Users link to open the Users page.
- Click on the Add New User button: On the Users page, click the Add New User button to start adding a new user.
- Enter User details: In the New User form, enter the user’s name, email address, and other relevant user details.
- Assign User Roles: Assign one or more User Roles by selecting them from the Role drop-down list. User Roles determine the user’s permissions and access levels in Exepron 3.0
- Set User Permissions: Set the User’s Permissions by selecting the appropriate options in the Permissions section. Permissions determine what the user can do within Exepron 3.0 and which projects the User can access and review.
- Save the New User: Once you have entered all the user details, click the Save button to add the new user to Exepron 3.0

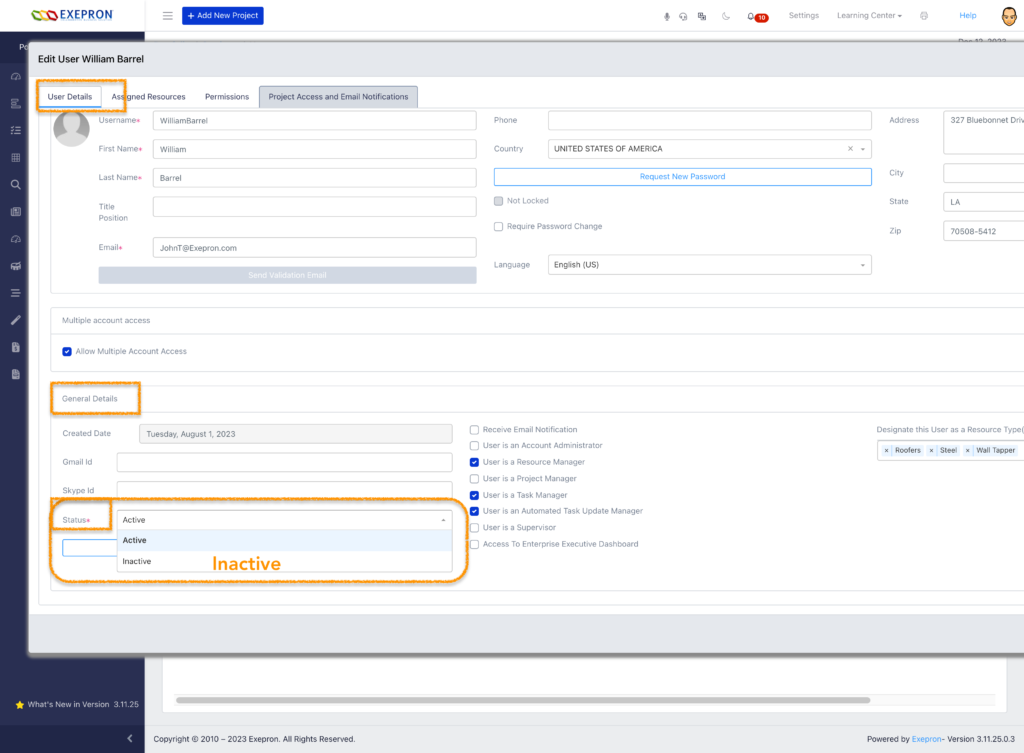
NOTE: to ‘Lock Out’ a User when they leave the company or are not allowed access to Exepron.
In Setting / Users / User Details / General Details / Change the User Status to INACTIVE.


