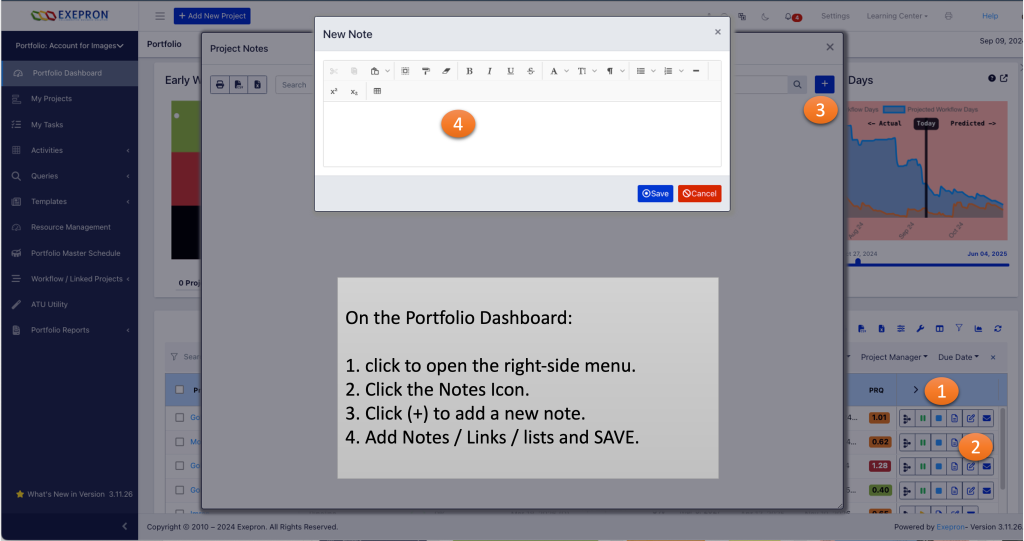
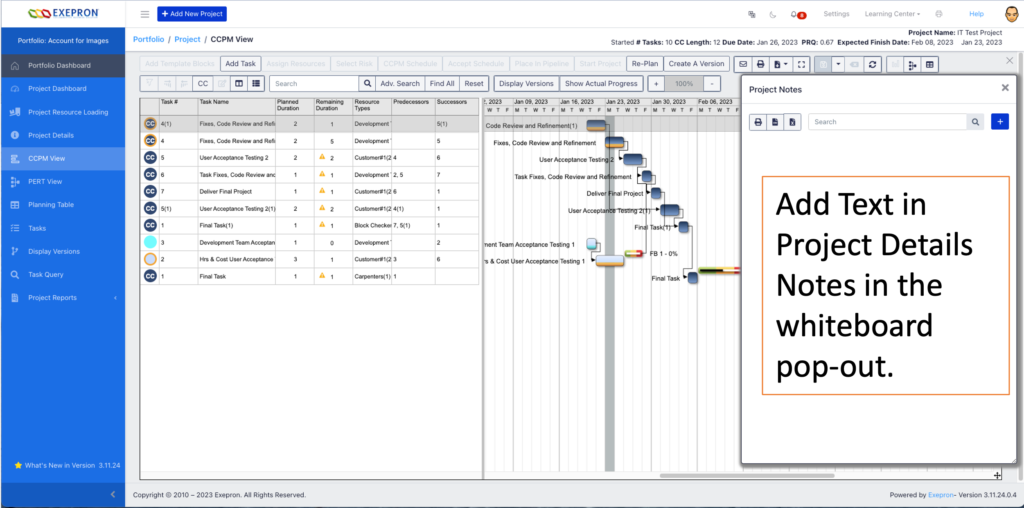
Add Project Notes as a pop-out from the Portfolio Dashboard. #
There is no need to navigate to each project dashboard to add Project Notes.
Users can add notes from the Portfolio Dashboard icons menu on the right-hand side.
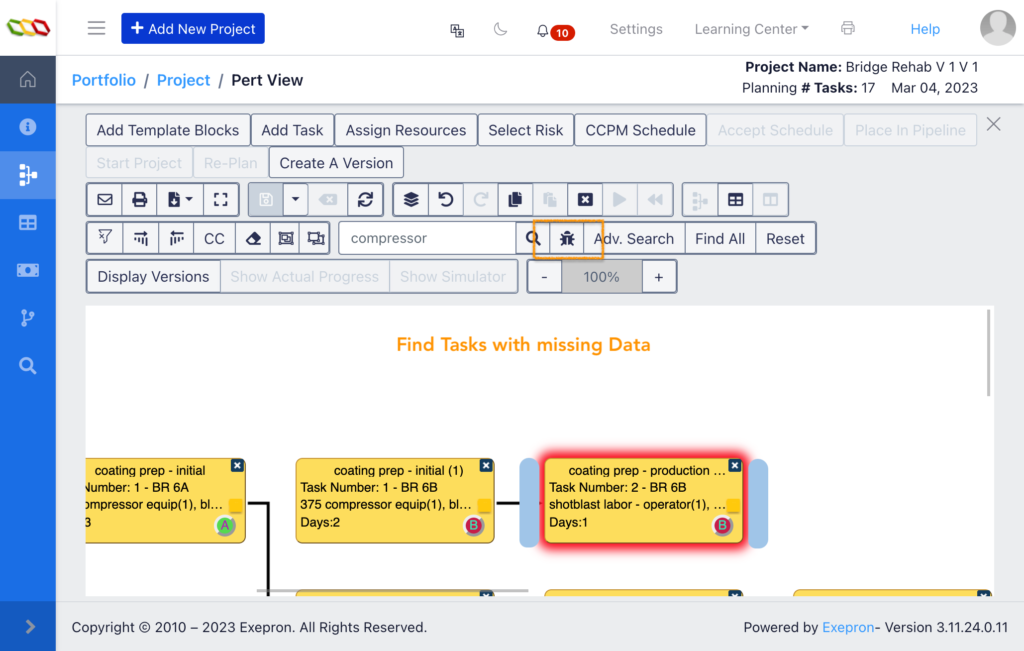
Find Tasks with Missing Items in the Planning PERT view. #
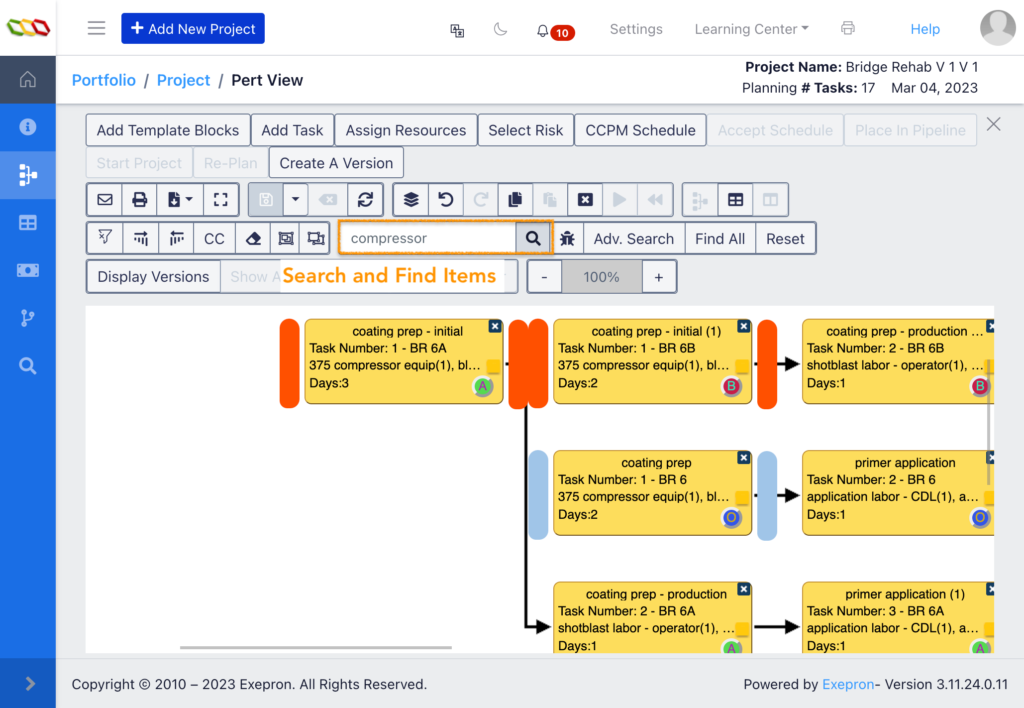
For Both Search Features: Search Button and the Find Missing Data.
- Search for the following item by clicking the button again and again (hold SHIFT to go back to a previous item)
- This will highlight the searched item in Red halo and Blue bars.
- Repeatedly clicking the button will find the next item. First Horizontally and then Vertically. Or in other words, the screen will scroll to the next tasks from top left to bottom right.
- If nothing is found, a message will display, “Item not found.”
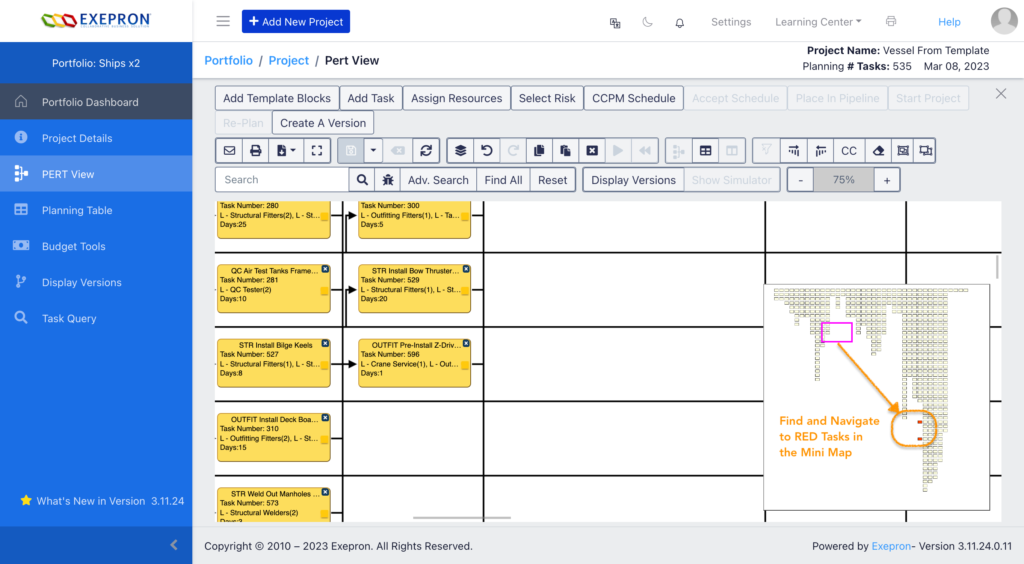
Mini Map Displays RED Tasks and updates in real-time. #
Use the Mini Map to view and navigate any RED Task in the Planning PERT.
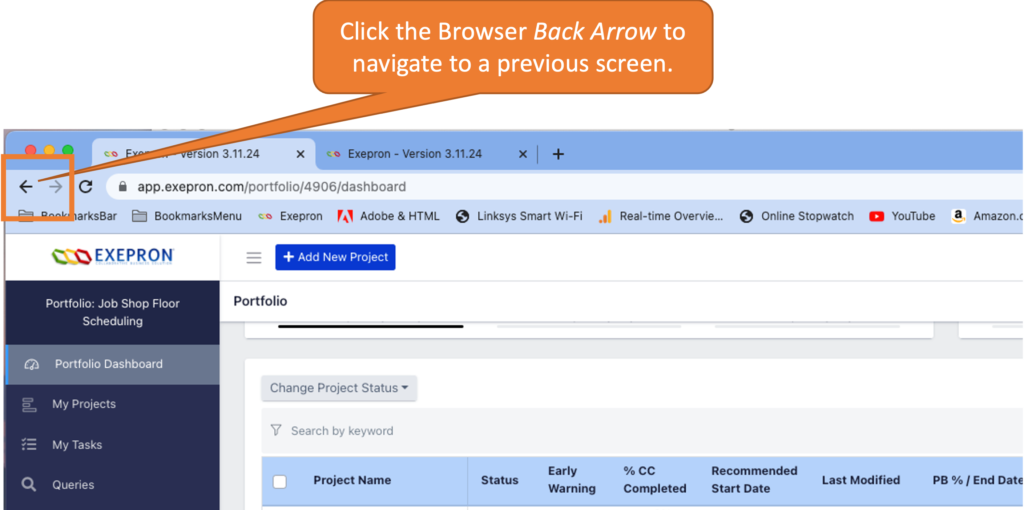
Previous Screen: Click the Browser Back Arrow to navigate to a previous screen. #
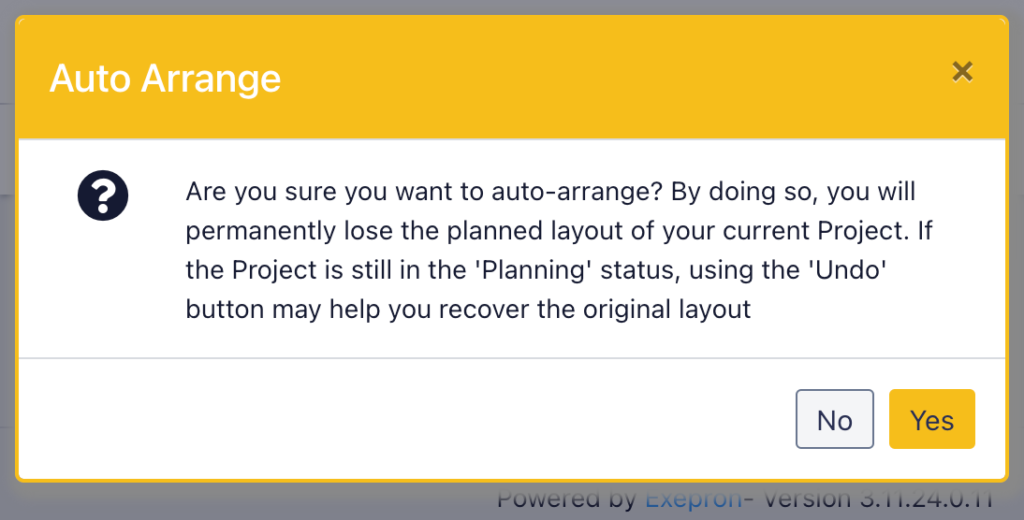
Undo an Auto Arrange #
There are safeguards to recover from mistakenly clicking the Auto Arrange.
- A Popup Message to warn the User that clicking the Auto Arrange is a permanent re-arrangement of the Planned Structure.
- The Undo Button can recover the structure when in the same Planning session.

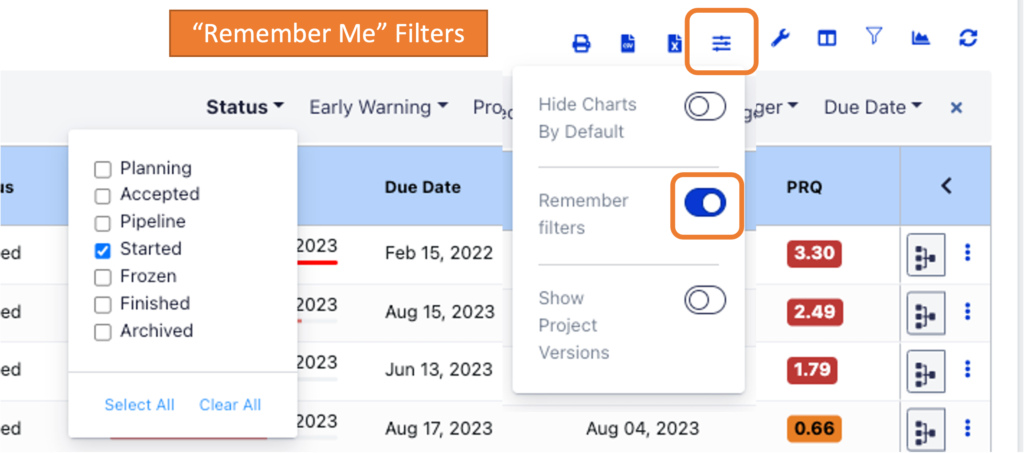
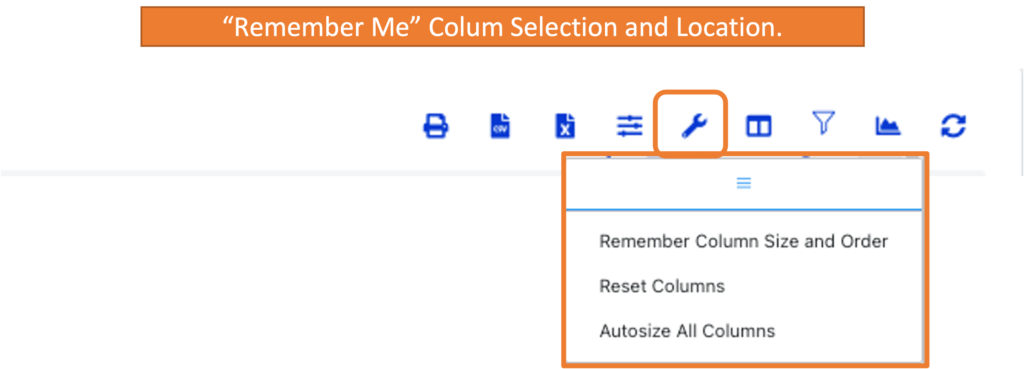
“Remember Me” for Filters and Column Selection and Location. #
On both the Project Dashboard and My Projects table:
Users can Filter by project Status and navigate away, log out, and back in; the filters will remain selected until switched off.
Users can Add Columns, change Column Locations, and navigate away, log out, and back in; the selection will remain in place until Reset Columns is selected.
Navigating between the various Project Statuses #
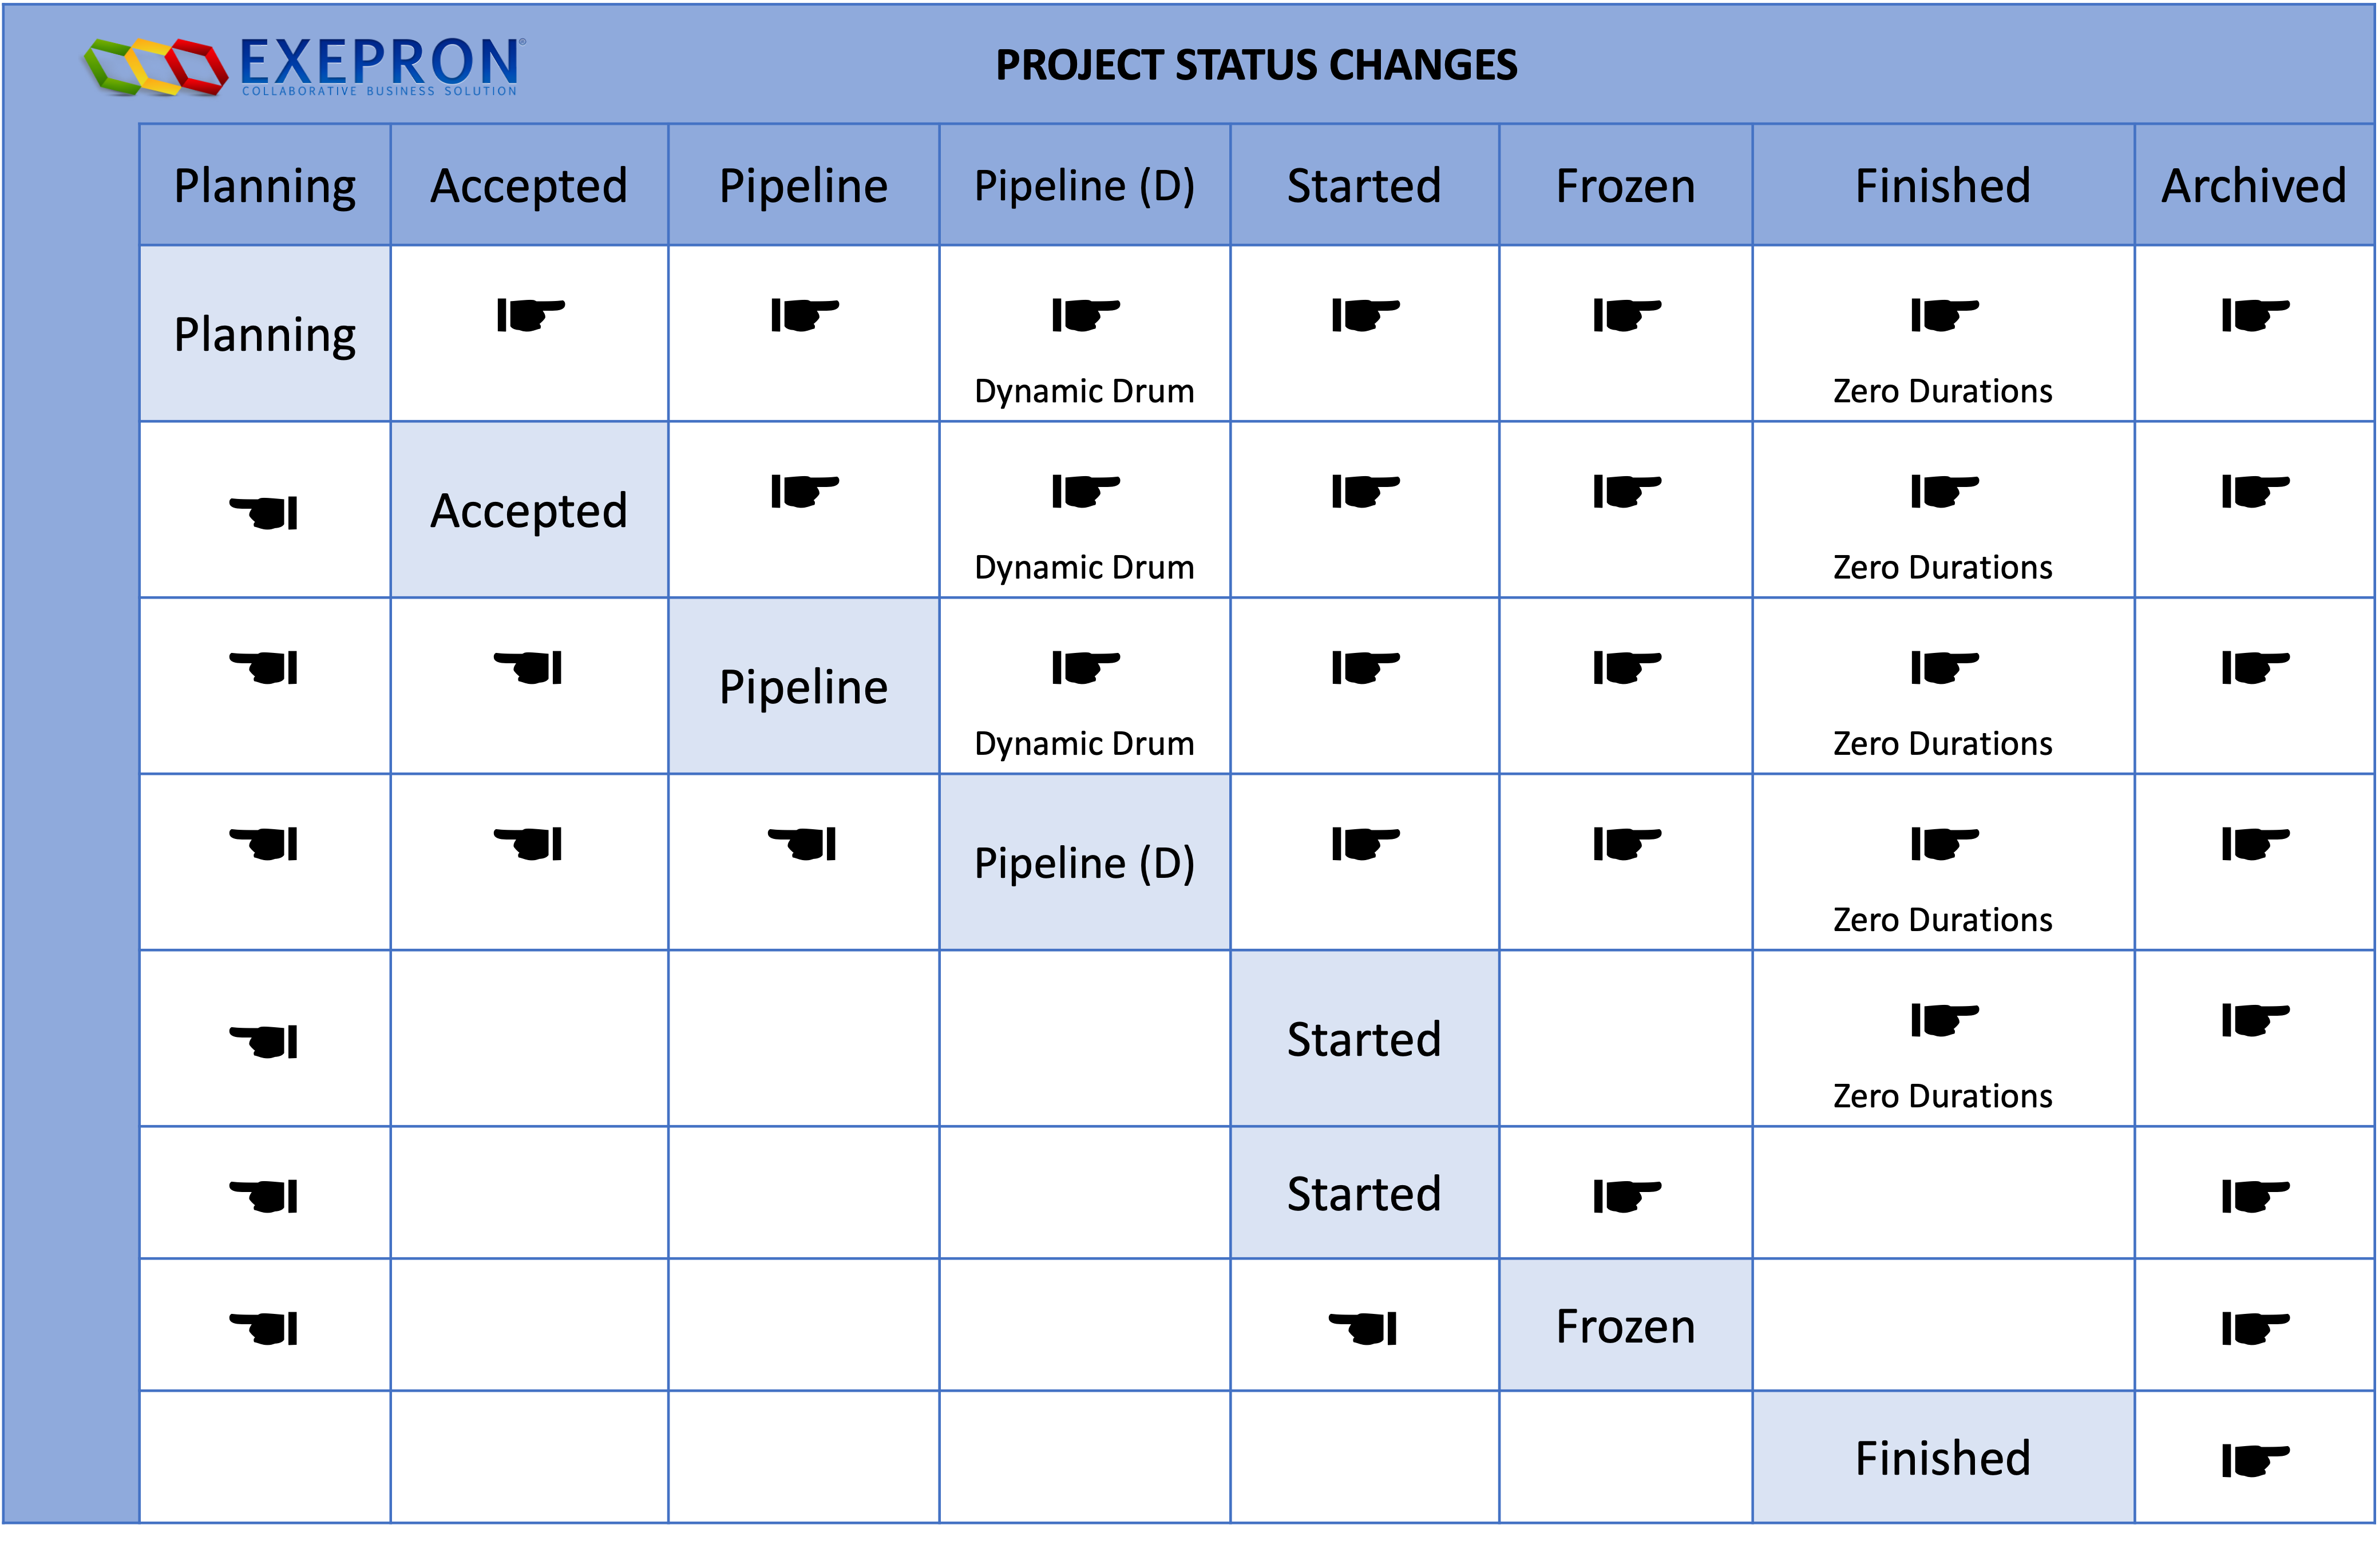
Users can change the Status of a project by selecting a Project on the Portfolio Dashboard and changing the Project Status.
Not all Status changes are logically possible. e.g., changing from PERT to Started Status without first running a CCPM and Accepting the Schedule.
The Status Navigation Table provides the routing direction when changing the Statuses of a Project.
Reducing Buffer Sizes? #
Can users reduce Buffer sizes in the CCPM method?
With Exepron, it is not possible to reduce buffer sizes. It’s important to understand that buffers protect the entire project, not individual tasks. Additionally, achieving the optimal Aggregation of Variance is best accomplished by maintaining a 50% buffer size. It’s crucial to recognize that delays can arise from within-task variations and, more importantly, external factors impacting the tasks, even when individual task durations are highly predictable.
If a project needs to be shortened, review the dependencies and consider shortening tasks by allocating additional resources. Many Dependencies are not ‘absolute’ and can be connected earlier within the project network. This approach will help in reducing the project duration.
It is possible to adjust to an earlier Due Date, but doing so will result in the Pre-penetration of the Project Buffer. This action will cause Exepron Early Warning and Project Risk Quotient (PRQ) to be overly sensitive and highly reactive.

Users can Log In and navigate directly to your Favorite Page. #
Purpose: To create a login shortcut to the page you use most often.
- Log Into Exepron.
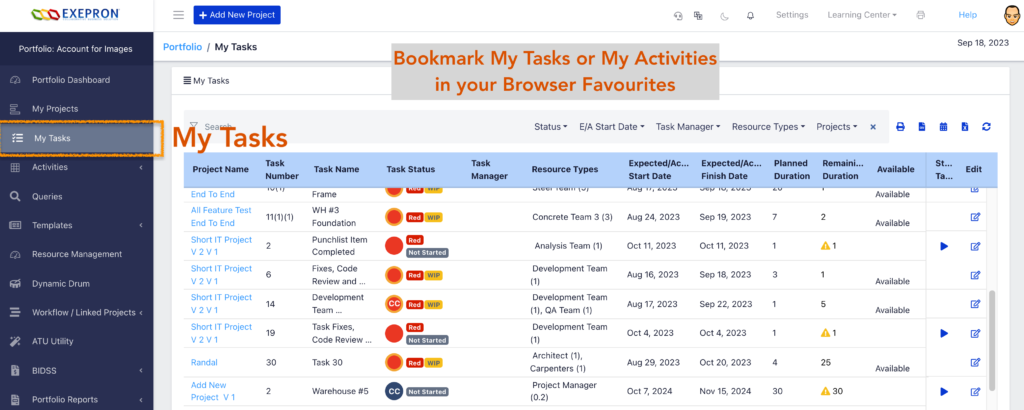
- Go to your favorite Exepron page. i.e., My Tasks, My Activities, My Projects etc.
- Bookmark this Exepron Page in your Browser as a Favorite.
The next time you log into Exepron using this favorites URL saved in your Browser, Exepron will navigate directly to your favorite page.
Custom Query: Exepron can create custom queries and save these as Custom Reports. #
In the main menu on the left, select Queries / New Query.
First, select your data field, select the operator, and then select the attribute.
Users can add multiple queries by clicking the (+) sign and repeat the sequence. Then Save and Name your custom query for future use.
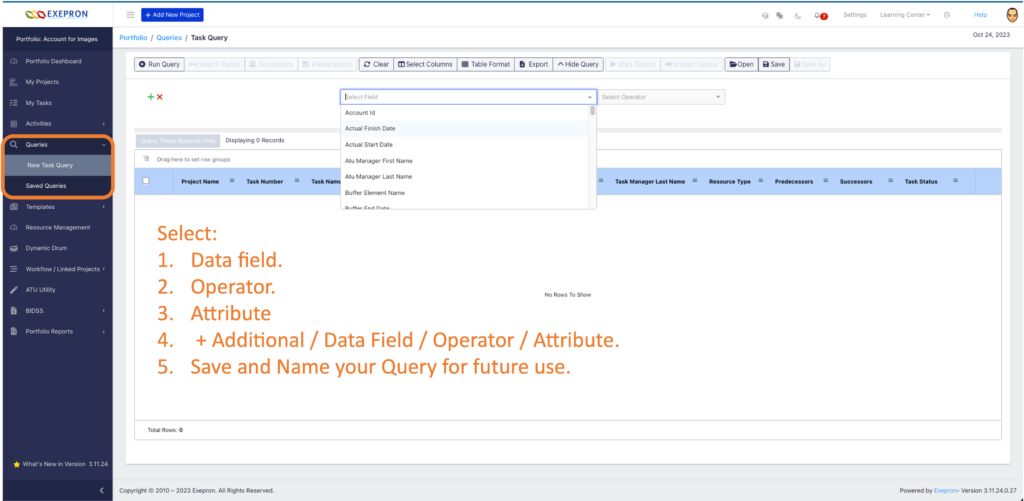
By saving the Query, you have added to a library of custom reports ready to recall as a standard Report at any time.

Enhance the Custom Query by adding Columns and changing the Table Format.
As with all Reports, you can export this query for further analysis.
The Query in interactive:
Users can ‘Start’ and ‘Unstart’ Tasks from within the Query.
- Select the Task check box on the left side of the Task Table.
- ‘Start’ or ‘Unstart’ the selected Tasks.

Full Kitting: Modeling Milestones for full Kitting in Exepron. #
Activity Management helps Track and Manage the Full Kits.
Before starting Critical Tasks [Assembly, Tooling or St Ups, Repairs, etc.], Full Kitting is essential if delays and rework are to be avoided.
There is usually a Person responsible for the“Full Kitting” Tasks.
Model Full Kitting Milestones and processes into the Project network is a valuable process to avoid these delay and rework issues.
The Full Kit can be assigned as a standard Activity List, and Activities on the List can also be made Mandatory.
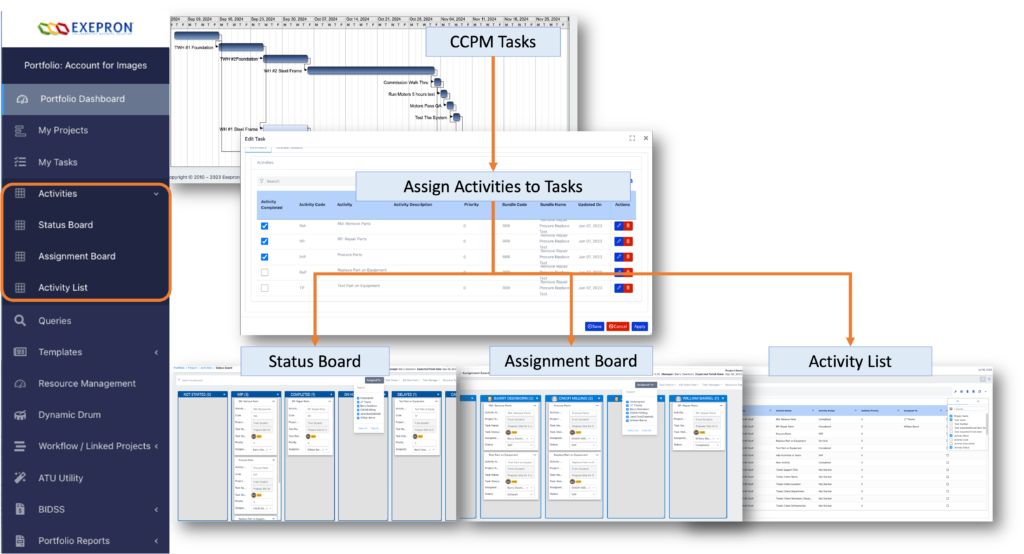
See the Activity Management section. Activity Management: Adding Activities to Tasks and Managing Activities
The Kitting Tasks can be included in a more extensive project network for complex kitting; separate Full Kitting projects feeding into a main project might be advisable.
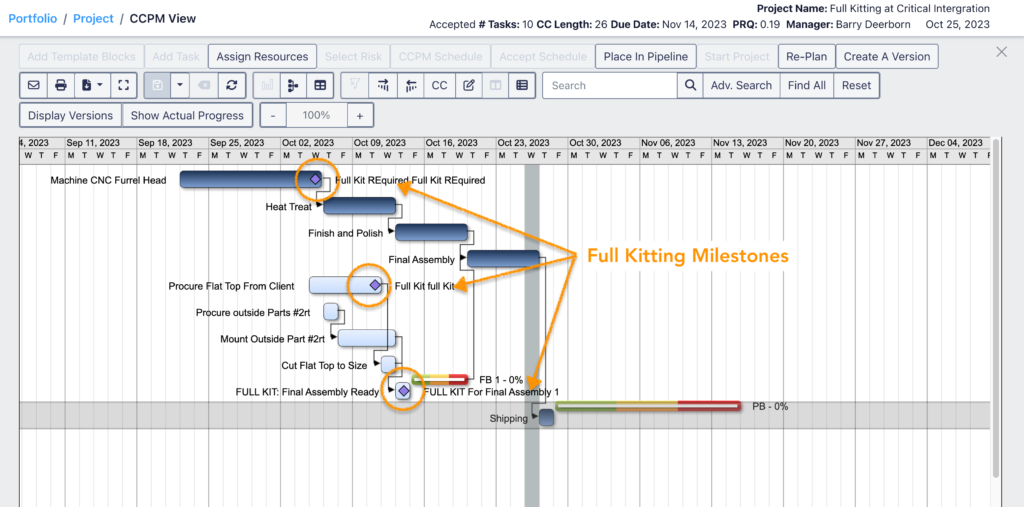
During Planning:
1. You can assign the Kitting Person as a Resource Type or
2. Assign them as a Task Manager to the Task in the Full Kit portion or
3. Use the Task Group feature in PERT view to “Tag” these tasks, also
4. You can use Template Blocks to create standard “Full Kit” Tasks inside a Project.
5. The “Milestone” feature can be applied to trigger the first Task in a Full Kit process.
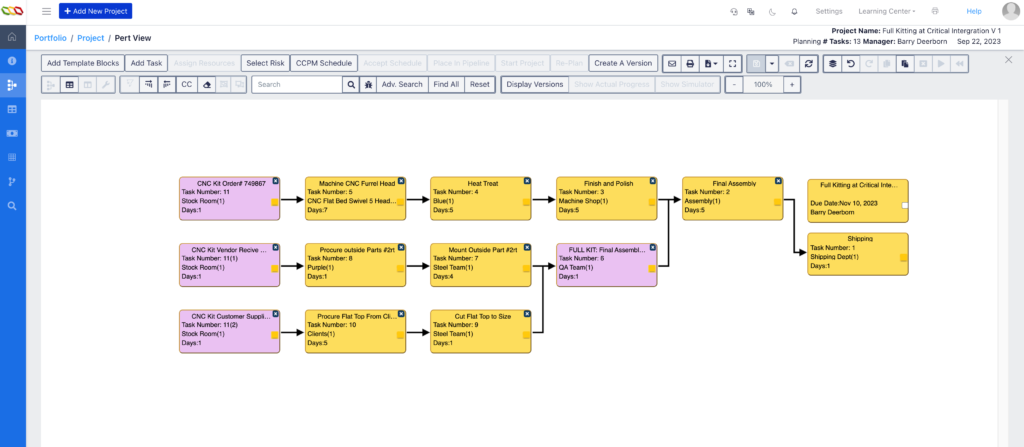
Applying a List of Critical Full Kit Items at handoff between departments, functions, or Divisions.
i.e. Materials à Operations à Fabrication à Shipping à Installation are potential Full Kitting hand-off points.
Only release work at the handoff when all critical items are in the Full Kit to avoid downstream delays due to missing elements.
Experienced Subject Experts should create and update Full Kit Lists.
Check the Pareto Chart for the Reason Codes and include the highest incidence of reasons for Task Delays in the Full Kits.


